Tuesday, 4 September 2012

Taking Blenderella out for a walk

I recently bought the book: "The Animator's Survival Kit" by Richard Williams.  So starting to get to grips with walk cycles and other animation magic and alchemy.

Not my first attempt :) but the first I am semi-happy with,  I decided to take Blenderella out for a nice stroll along the beach.


 More to come.


Monday, 20 August 2012

City Updated


I updated the City scene with a YouTube link below.

 City Overview


I also posted it on BlenderArtists.org


Thursday, 9 August 2012

City

I'm just back from a week's vacation in New York with my family.    I wanted to make a city scene in Blender while the images of the city are still fresh.

I took the basic approach for building the city from Andrew Price's city tutorial,  but I took most things further than he attempted.  I wanted to be able to animate the city and zoom from height down to street level.  To acheive this, I needed to use low poly models as far as possible but be good enough and detailed enough for close up animation.

Here are some stills from the finished set-up.

City Overview
Some quick stats.  The city has 1,901 buildings.  You will see where the 1 comes from at the end.  The buildings are made up of 20 unique models that are arranged via a particle system over a grid of verticies (technique courtesy of Andrew's tutorial).   

One touch I am especially pleased with is adding a lattice to the main ground plane that allows hills to be created across the city to give additional variation in height for the horizon.  By having the roads and other elements also linked to the lattice,  everything stays in alignment.

Descending to street level
Most of the effect comes from textures.  65 image textures (most of the building ones from CGTextures.com),  with masking to vary the reflection effects for windows and shop fronts and to add some displacement to flat surfaces.

Street Level.
The street we were staying in in Manhattan had a view just like this, with the sky visible at the end of a long "canyon" of skyscrapers.

I have  fixing the wheel arches of the vehicles on my to-do list.  I have never done a vehicle model.  Apart from the wheel arches, I enjoyed making these low poly versions.  I must get round to adding vehicle modelling to my skills at some point soon!


Broadway

 Some more stats: the city contains a lot of vehicles,  all of them animated and moving along pre-defined paths.  84 Taxis, 9 Police cars, 8 blue sedans, 8 black SUVs.   

It was quite fun making sure there were no collisions at junctions as I worked on the speed and timing of the traffic.  I quickly realised there was just no way of getting the streets to feel conjested at this scale, it would take many thousands of vehicles.  For a heavy traffic scene, I would need to model one or two streets only and split the action into smaller cut scenes.  My cover story for this city is that the animation was done early in the morning,  see the sun angle and long shadows supporting my claim ;)

 
Wee Shuftie Tower

In New York, I saw that Donald Trump has at least two towers with his name on them.  He is in the process of building a golf course where I live in Aberdeen.  Well, this is my city, so....    voila - Wee Shufty Towers.   It is actually modelled after one of Donald Trump's towers in Chicago.

I added some static billboard people to this final scene.  It was not practical to animate enough people across the city to be convincing,  and during the animation,  lots of people standing still looks really odd.  If anyone has ideas on how to animate low poly crowds,  I would be very interested to hear.

Blue Skies

Finally, some nice blue skies to go with Wee Shuftie's new corporate headquarters.

Here is the rough render animation I did to test timings.  I kept the render times for this version to about 30 seconds per frame with 10 iterations of Cycles in Blender.  But with my final version now at 1,167 frames,  even this rough version takes about 15 hours to produce.


The test animation was well worth doing,  it produced a list of items I was able to work on to improve.

  1. Road markings wrong scale - fixed
  2. Cars off-road - fixed
  3. Scaffolding too short - fixed
  4. Landing vibration on camera too severe - fixed
  5. Need to fake rotating wheels on cars in close-up - fixed
  6. Need to create reflection masks for shop fronts - done
  7. Add loop-cuts to bulding rooftop balconys to improve close-ups - done
  8. Fix traffic light sequence - not done,  decided to run the red light :)
  9. Scrap the end-scene with dodgy looking studio and replace with Wee Shufty Tower as a more fitting corporate HQ.
  10. Spotted a lamp-post off the kerb - fixed
  11. Pavement (sidewalk) textures need replaced - fixed
  12. Remove un-needed lamposts and traffic lights from parts of the city not seen.  I originally had lights on every single street!
  13. Average out the burst of speed on landing - unrealisic. - to do
  14. Smooth out the turn on the first corner - to do
  15. Add billboard people to end scene. - done
  16. Step through each frame looking for boring shots and adjusting elements and composition in each - still tweaking

I am still tweaking frames before hitting the go button for the final render. I will give it a few days to make sure I am happy before doing the big render run.

UPDATE:  I realised I could use the same technique to add cars as used to add buildings.  This made it possible to add a few thousand more cars to the scene.  You can almost hear the honking!

I also narrowed the road to more realistic proportions on the streets but left the avenues nice and wide.  To do this I had to go back to the basic structure of the scene and re-work quite a bit.  I also had to model additional low buildings as the overall density became too much.


This is starting to feel right,  tweaking continues...

Wednesday, 25 July 2012

Cutie and the Snail

This was inspired by an article and tutorial in the September edition of 3DWorld by Antony Ward.   really like that the picture tells a story and the simplicity of the modelling.  I would like to take this further, but to do that, I need my own story to tell.

Once again, time is against me,  need to call this done and head to the airport for vacation.


Monday, 23 July 2012

Book Animation


From a tutorial on BlenderCookie by Stanislas Paillereau.  The mechanics of the turing pages are amazing.  The cover opens and flattens realistically, the spine deforms,  the thickness of the mass of pages moves correctly as the pages flip.  Expect any books included in my scenes from here in to look a lot like this.


Sunday, 15 July 2012

Quick Sketch

Only at home for one day this week - just enough time to knock out a quick version of a character I saw in the September edition of 3D World.    There is a series of tutorial videos that accompany the character in the mag,  I have not been through them yet,  I will catch up with that when I have more time.


Saturday, 23 June 2012

Birlinn Illustration

I was quite exited last week to be asked by Differentia Design to do an illustration of a Birlinn (traditional Scottish ship) for an information panel to go on the Caledonian Way, near Castle Stalker.


The main image is done in Blender using the Birlinn model I made a while back.  Castle Stalker is roughed out in the background along with an approximate skyline.  Rendered in Cycles with postprocessing done in Photoshop,  mainly for the foam on the sea.

This is one of several images that will form the information panel.  I will update with a picture of the completed panel when that is available.

Monday, 18 June 2012

Retexturing Blenderella

Not had much time of late.    My earlier attempts at texturing my Blenderella model needed some love.   Using the BProject addon (under the experimental add-ons),  I was able to get a skin texture for the face and body I was happy with at last.  Using a UV image texture plus a translucent material with fake skull added to the model to assist with proper subsurface scattering.   Rendered in Cycles. 


Saturday, 19 May 2012

Mina


 Introducing - Mina.

Mina


Back to basic drawing lessons,  partly because I am really rusty and partly to get to grips with Photoshop Elements.

CG Cookie has a course on concept art that looks really difficult.   Following the principle: try something you don't think you can do, I plugged in my Wacom and jumped straight in.

I am quite happy with the result.  Although trying to measure up against Vonn on the CG Cookie site is a tall order.


Monday, 7 May 2012

Tornado

Making the most of a bank holiday weekend,  I managed to climb a hill,  do some plumbing around the house and make a tornado using Blender's smoke simulator.

Inspiration and technical tips fron a tutorial by Thomas Piemontese on BlenderCookie.com


The most time consuming part was creating the house in a way that would disintegrate properly.  If I had more time, I would like to re-work the way the building parts are caught-up in the vortex,  some are moving way too fast for their mass.  Edit:  done

Edit 13th May: I re-did the physics for the disintegrating building and uploaded a new video.
It was thanks to a tutorial I came accross while browsing Andreu Cabré's site (original at BlenderDiplom) that helped most in figuring out how to control the particle distruction of the house. 


Sunday, 6 May 2012

Rocket Animation

My images have been a little still recently.  I thought I should do some animation,  mainly because I am not so good at it and I could use the practise.  I based this on a tutorial by David Ward at CG Cookie but after watching it through,  I did the modelling and smoke sim on my own without reference to the tutorial.


A couple of painful learning points during the making of this clip.  1) Don't change the size of the smoke domain in Blender in edit mode.  There is some sort of bug and the domain MUST be a 2x2x2 cube, scaled in object mode.   2) Don't expect to save the file, reopen it and the smoke will play the same way twice.  After a few hours rendering, I shut down my PC, to continue rendering next morning.  Unless you have baked the smoke sim to a cache on disk,  it will be slightly different each time you create it in memory after reloading Blender. 


Thursday, 3 May 2012

Rampant Rudolph

Another tutorial from CG Cookie.  I know it is out of season, I started modelling a cartoon deer and it just had to have a red nose - voila,  Rudoph.


Rampant Rudolph


 He has a simple rig for posing and animation.  The fur was quite tricky to set up,  I ended up differing from the tutorial and using vertex as the particle emitter to give more control on fur density across the mesh.

Sunday, 29 April 2012

Architectural Visualisation

Working through a great short course at CG Cookie for producing architectural visualisations in Blender.  Here is the result.


Some great tecniques learned on how to get the best out of the latest Blender builds.  The course concentrated on several important areas, lighting, texture and composition. 

Some of the models in the room were bundled with the course and came from Blendswap.    The wall poster comes from Paul T Kavanagh at NewsnetScotland.

The view out the window comes from my own home-office.  I deliberately turned up the reflections in the window to obscure the view of the neighbours,  I quite like the effect.

Here is the wireframe during modeling:


And the Ambient Occlusion pass - which I also think looks quite cool:


Saturday, 21 April 2012

Owls

Something a wee bit different.  Inspired by an image in this month's 3D World Magazine by Theodoru Badiu.  Modelled and textured in Sculptris. Rendered in Blender using Cycles.


Sunday, 15 April 2012

Birlinn update

Using what I learned in the fluid-sim tutorial, I made a dummy hull and ran a fluid sim over it to create a pretty decent bow wave.  I then applied the sim and imported the resulting mesh into my Birlinn scene,  applied the same material as the sea and re-rendered. 


This is a much easier way of creating a sense of movement through the water.


Tuesday, 3 April 2012

Windfarm in the Morning

After the trauma of the Waterfall scene,  I wanted to do something quick and easy.

Voila,  an offshore windfarm in a misty sea.


Total modelling, texturing and rendering time, about 4 hours start to finish.

Forest Stream - fluid simulation on Amazon Cloud Compute Servers

The Nature Academy is re-running and I have been keeping an eye out for the additional tutorials available in this second course.   This one is a real test of my hardware spec.  It involved running a fluid simulation over the model of a stream-bed and some rocks.
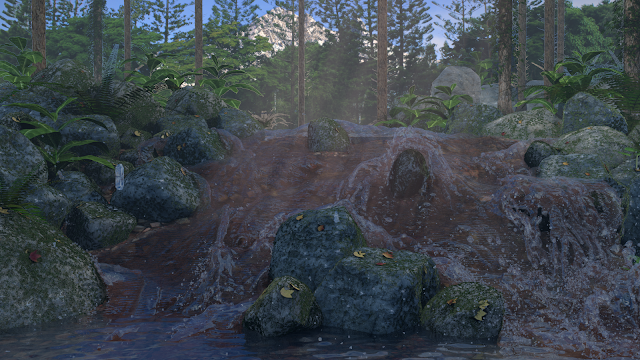
Final Version


Fluid simulations, it turns out, are very memory intensive,  although I have a quad-core system and plenty of compute power, I only have 8Gb RAM.  That is the max my motherboard can take (ASUS Rampage Formula) so a memory upgrade is not an option without some serious cash outlay on a new system or at least a new motherboard.

Having set up the model of the stream-bed, the max resolution I could run the fluid simulation at was 400 (that is 400 on the x, y and z axis of the fluid domain).  To get anything like acceptable results, I needed to get this above 600.

My scene was pretty heavy,  as well as the fluid simulation, the scene had around 7.4 million vertices and 14 million faces.  The moss on the rocks are particle systems modelling each moss strand. 

Initial attempt on my home PC: 
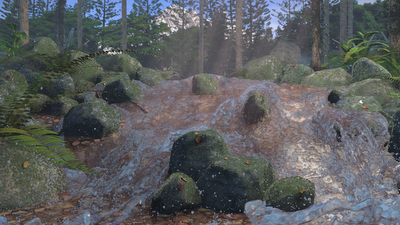
Best I could achieve on my home PC

Not too bad but took > 24 hours to run the fluid sim (at a low 400 resolution) and render.  With those sort of cycle times, making adjustments and re-rendering to confirm the result is just not workable.  There is a really ugly splash right in-front of where I want the camera to be in this scene,  I could try to sculpt that out in edit mode, but my PC is really struggling and keeps crashing.

Time to dial-up some on-demand cloud computing power


I use Amazon Web Services (AWS) for extra compute power on-demand at work, so I set about figuring out how best to use compute power from the cloud to solve my problem.


It turned out to be pretty easy.

If you have not done this before, you first need to set up an AWS account (aws.amazon.com).  They have a sign-up process you will need to go through that involves providing your credit card and validating your account.  AWS has a lot of options and can look intimidating at first glance,  The service you need to run a server is EC2 (Elastic Cloud Computing).  There are getting started guides that I would recommend you look through. 

There are a few things you need to set-up.   
  1. An AWS account
  2. A key pair used to identify you and allow you to securely log into the cloud servers you create.
  3. A security group (if you are using a Windows machine, your security group needs to allow port 3389 to connect using RDP).
I will concentrate on Windows.  If you plan to use Blender on a Linux machine, you probably don't need my help working through the options for AWS and there is a lot of searchable help on the internet if you get stuck. Linux is cheaper on AWS than Windows - so worth some investigation.

Please note:  AWS is not free.  Starting services on AWS will result in charges being made to your account. Some charges, like storage costs,  will keep on coming even after you stop or terminate the server.  The charges are pretty low but it is always worth keeping an eye on you account summary during and after using the service to avoid any nasty surprises when the monthly bill comes in.   I have posted my costs below to give you an idea what to expect.  I have also included price information in this post, AWS pricing changes often (usually coming down) although the proces I mention are accurate when posted, if reading this in the future, go check the AWS site yourself for up-dates.

On-demand prices for running AWS servers are available >>here<<

Once you get to a point where you can start your own server and log onto it,  you can use it for some additional compute power when needed.

Installing Blender on a Windows server is done exactly the same way you would install it on your own PC.  Log onto your server, open Explorer and go to blender.org or graphical.org for the latest build.  Once I got a set-up I was happy with,  you can convert your server to a Private AMI (Amazon Machine Image) from the AWS Console.  A Private AMI can be used in future to very quickly launch a new Blender server.   The image file for the Private AMI will cost you a few cents per month in storage costs - but the cost is negligable. 

A very nice feature of the Private AMI is you can use it to launch any size of server from the micro ($0.035 per hour) to the high-memory extra large ($0.570 per hour), to the extra large memory plus quad core CPU ($0.920 per hour) depending on what you are doing.    For initial set-up and messing around, you could use the mico size, but you will need something bigger for doing actual work on.


Don't bother with additional items like an elastic IP address.  It costs, and unless you are launching a public facing web-server, you don't need it.

You also need somewhere to store your blender files and for working space for cache files and output.  A Windows server will come with 30Gb of EBS (Elastic Block Storage) mounted as C:\ when it starts.  Beware though,  the EBS volume that comes with a server will delete if you terminate the server.

I recommend keeping your data seperate from the Windows operating system and avoiding putting any blender files or data into C:\ .  A better solution is to create your own EBS Volume of say 80Gb that you can mount to a server whenever you need it.  Note: this will cost and you pay for the size of disk you create, not how much you fill it - but again, not very much. ($0.11 per Gb per month or $8.80 per month for 80Gb)

If the EBS volume does not appear as a drive letter after attaching it from the AWS Console, you may need to run "diskmgmt.msc" from the server to online and format the disk.  The steps involved are laid out pretty clearly >>here<<

If you are still with me, so far you have a Private AMI that you can use to launch any number of servers from and a space to store your .blend files.   The next problem is how to get your .blend file loaded onto your Amazon server to get some work done.

This is most easily achevied using the Remote Desktop Connection client from a Windows PC,  from the client, Local Resouces tab, More button, you can choose local drives that will appear as connected drives on your server when logged in.  Simply copy the .blend file you are working on over to your attached EBS volume.


Oh, and I guess it is obvious, but only the .blend file and the output images need be copied back down when the job is complete.  The 40Gb + of simulation data is throw-away.

A thought for the future:
It would be straight forward to use the steps here to create multiple network render instances of Blender to handle animations.  One server would be configured as the master with however many servers you want configured as slaves.  Each machine would need to be capable of rendering a scene,  so likely looking at large Windows instances (with 7.5Gb RAM) for both Master and Slaves at around $0.460 per hour each.

Back to Blender

So, now I have a high-memory extra large server running on Amazon with the latest build of Blender running, back to my initial problem,  I was able to re-run the fluid simulation at a resolution of 600 which took about 18 hours on Amazon.  Anything over a resolution of 400 crashed my machine previously.

Next problem,  getting the right settings on the water material for my stream. Here are some interim results.

1st attempt:

 Using raytrace for the water material. 2 samples for transparency not enough resulting in black areas over water surface.  Render-time approx 4 hours using 12Gb Ram (out of max 14Gb).

2nd attempt:


Raytrace on the water material, using 4 samples for transparency.  Render-time approx 12 hours, 12Gb RAM.  Some sort of water monster rising from the deep in the centre.  This is getting silly again - switching to zbuffer transparency to try a different approach.

3rd attempt:

Water surface is too indistinct,  but the droplets are better.  Render time 2 hours: 22 minutes, 12Gb RAM.

And the wallet damage:


Anybody want to buy a print?

Sunday, 18 March 2012

Desert Scene

At last some free-time.  I've not been able to post anything for a while. 

The Nature Achademy is re-running for it's 2nd intake and there have been a couple of additional tutorials added to the course.  This is one of them,  a desert scene.  It is pretty close to the tutorial,  I upped the number of strand particles for the grass and I added some displacement to the foreground rock.

Desert Scene

Saturday, 11 February 2012

Jewels for Emily

Not had much time (as usual).  There was an interesting tutorial on this month's 3D World mag by Alex Telford on creating realistic jewellery.

Here is my attempt,  dedicated to my Daughter Emily.


Created in Blender 2.6.1, rendered in Cycles.  Post-processing in Photoshop.

Wednesday, 4 January 2012

Birlinn

A birlinn is a type of ship used in Scotland from the 14th to 17th centuries.  It is similar to a Norse longship with a square sail, but is steeper at the bow and often with a rudder at the stern.  The larger birlinns reportedly had over forty oarsmen and must have been a considerable size.

Although it was widely used for over 400 years, apparently, no originals have been found.  The basic shape is taken from old diagrams and photos of modern reconstructions.

Birlinn

The image above is the completed version,  some of the work-in-progress updates below...

WIP - Sea Texture and spray still to be added


Modelled and rendered in Blender v2.61.  Crew created in MakeHuman.  Rendered with Cycles.

Some notes on the modelling. I am using the Ocean simulator in Blender 2.61,  to that I have added dynamic pain effects to displace the ship's hull, create a bow wave and wave effects for a wake,  although these are not so obvious in the renders.  I tried to get some foam effects on the bow wave and wake, but have not figured that out as yet.  I am starting to suspect I am trying to use a Cycles feature that has not yet been enabled.


While searching for reference material for birlinns,  came across some beautiful illustations on the website for Portencross Castle.  The artist is not named.  This is the sort of standard I would love to attain.

UPDATE:  I finally  managed to get a particle system working alongside the dynamic paint effects.  (below).    For some reason, re-baking particles requires that you exit and restart Blender before they show up.  I also ran into trouble with the scaling combined with the physics.   On my initial attempts, the speed of the ship scaled up to 20m/s,  no wonder is was leavng the water after hitting a big wave.  Unfortunately, at 7 minutes a frame, it is not practical to run a full animation from my workstation (it works out at an estimated 28 hours render time for 10 seconds of animated output).  Perhaps time to get a server running on AWS for this?


Also posted on BlenderArtists.org