This is my personal blog showcasing my digital creations. Most images created using Blender, an open-source and extremely versatile 3D creation package, available at: www.blender.org
This is the Forth Bridge, a cantilever bridge built for rail traffic in 1890.
The 1st draft gets the basic shape sorted out, I need to go back and add grunge and textures.
2d draft - worked on the textures and a better water surface. I managed to figure out a simple way of adding some mist to the background - I added a very large cube with a volumetric scattering material in the background rather than fiddling with the unintended near-field effects of applying mist to the whole scene.
I recently bought the book: "The Animator's Survival Kit" by Richard Williams. So starting to get to grips with walk cycles and other animation magic and alchemy.
Not my first attempt :) but the first I am semi-happy with, I decided to take Blenderella out for a nice stroll along the beach.
I'm just back from a week's vacation in New York with my family. I wanted to make a city scene in Blender while the images of the city are still fresh.
I took the basic approach for building the city from Andrew Price's city tutorial, but I took most things further than he attempted. I wanted to be able to animate the city and zoom from height down to street level. To acheive this, I needed to use low poly models as far as possible but be good enough and detailed enough for close up animation.
Here are some stills from the finished set-up.
City Overview
Some quick stats. The city has 1,901 buildings. You will see where the 1 comes from at the end. The buildings are made up of 20 unique models that are arranged via a particle system over a grid of verticies (technique courtesy of Andrew's tutorial).
One touch I am especially pleased with is adding a lattice to the main ground plane that allows hills to be created across the city to give additional variation in height for the horizon. By having the roads and other elements also linked to the lattice, everything stays in alignment.
Descending to street level
Most of the effect comes from textures. 65 image textures (most of the building ones from CGTextures.com), with masking to vary the reflection effects for windows and shop fronts and to add some displacement to flat surfaces.
Street Level.
The street we were staying in in Manhattan had a view just like this,
with the sky visible at the end of a long "canyon" of skyscrapers.
I have fixing the wheel arches of the vehicles on my to-do list. I have never done a vehicle model. Apart from the wheel arches, I enjoyed making these low poly versions. I must get round to adding vehicle modelling to my skills at some point soon!
Broadway
Some more stats: the city contains a lot of vehicles, all of them animated and moving along pre-defined paths. 84 Taxis, 9 Police cars, 8 blue sedans, 8 black SUVs.
It was quite fun making sure there were no collisions at junctions as I worked on the speed and timing of the traffic. I quickly realised there was just no way of getting the streets to feel conjested at this scale, it would take many thousands of vehicles. For a heavy traffic scene, I would need to model one or two streets only and split the action into smaller cut scenes. My cover story for this city is that the animation was done early in the morning, see the sun angle and long shadows supporting my claim ;)
Wee Shuftie Tower
In New York, I saw that Donald Trump has at least two towers with his name on them. He is in the process of building a golf course where I live in Aberdeen. Well, this is my city, so.... voila - Wee Shufty Towers. It is actually modelled after one of Donald Trump's towers in Chicago.
I added some static billboard people to this final scene. It was not practical to animate enough people across the city to be convincing, and during the animation, lots of people standing still looks really odd. If anyone has ideas on how to animate low poly crowds, I would be very interested to hear.
Blue Skies
Finally, some nice blue skies to go with Wee Shuftie's new corporate headquarters.
Here is the rough render animation I did to test timings. I kept the render times for this version to about 30 seconds per frame with 10 iterations of Cycles in Blender. But with my final version now at 1,167 frames, even this rough version takes about 15 hours to produce.
The test animation was well worth doing, it produced a list of items I was able to work on to improve.
Road markings wrong scale - fixed
Cars off-road - fixed
Scaffolding too short - fixed
Landing vibration on camera too severe - fixed
Need to fake rotating wheels on cars in close-up - fixed
Need to create reflection masks for shop fronts - done
Add loop-cuts to bulding rooftop balconys to improve close-ups - done
Fix traffic light sequence - not done, decided to run the red light :)
Scrap the end-scene with dodgy looking studio and replace with Wee Shufty Tower as a more fitting corporate HQ.
Spotted a lamp-post off the kerb - fixed
Pavement (sidewalk) textures need replaced - fixed
Remove un-needed lamposts and traffic lights from parts of the city not seen. I originally had lights on every single street!
Average out the burst of speed on landing - unrealisic. - to do
Smooth out the turn on the first corner - to do
Add billboard people to end scene. - done
Step through each frame looking for boring shots and adjusting elements and composition in each - still tweaking
I am still tweaking frames before hitting the go button for the final render. I will give it a few days to make sure I am happy before doing the big render run.
UPDATE: I realised I could use the same technique to add cars as used to add buildings. This made it possible to add a few thousand more cars to the scene. You can almost hear the honking!
I also narrowed the road to more realistic proportions on the streets but left the avenues nice and wide. To do this I had to go back to the basic structure of the scene and re-work quite a bit. I also had to model additional low buildings as the overall density became too much.
This is starting to feel right, tweaking continues...
Working through a great short course at CG Cookie for producing architectural visualisations in Blender. Here is the result.
Some great tecniques learned on how to get the best out of the latest Blender builds. The course concentrated on several important areas, lighting, texture and composition.
The view out the window comes from my own home-office. I deliberately turned up the reflections in the window to obscure the view of the neighbours, I quite like the effect.
Here is the wireframe during modeling:
And the Ambient Occlusion pass - which I also think looks quite cool:
A birlinn is a type of ship used in Scotland from the 14th to 17th centuries. It is similar to a Norse longship with a square sail, but is steeper at the bow and often with a rudder at the stern. The larger birlinns reportedly had over forty oarsmen and must have been a considerable size.
Although it was widely used for over 400 years, apparently, no originals have been found. The basic shape is taken from old diagrams and photos of modern reconstructions.
Birlinn
The image above is the completed version, some of the work-in-progress updates below...
WIP - Sea Texture and spray still to be added
Modelled and rendered in Blender v2.61. Crew created in MakeHuman. Rendered with Cycles.
Some notes on the modelling. I am using the Ocean simulator in Blender 2.61, to that I have added dynamic pain effects to displace the ship's hull, create a bow wave and wave effects for a wake, although these are not so obvious in the renders. I tried to get some foam effects on the bow wave and wake, but have not figured that out as yet. I am starting to suspect I am trying to use a Cycles feature that has not yet been enabled.
While searching for reference material for birlinns, came across some beautiful illustations on the website for Portencross Castle. The artist is not named. This is the sort of standard I would love to attain.
UPDATE: I finally managed to get a particle system working alongside the dynamic paint effects. (below). For some reason, re-baking particles requires that you exit and restart Blender before they show up. I also ran into trouble with the scaling combined with the physics. On my initial attempts, the speed of the ship scaled up to 20m/s, no wonder is was leavng the water after hitting a big wave. Unfortunately, at 7 minutes a frame, it is not practical to run a full animation from my workstation (it works out at an estimated 28 hours render time for 10 seconds of animated output). Perhaps time to get a server running on AWS for this?
For Christmas, I received a new graphics card. NVIDIA GeForce GTX508, with 3Gb RAM and 512 CUDA cores! Blender can offload the rendering to the GPU. A test render that took over 9 minutes using my Intel Core 2 Quad CPU, takes only 51 seconds on the new GPU. This makes an amazing difference with real-time feedback when tweaking textures.
Here is a test scene that I was not able to make look good using CPU only rendering, I couldn't get the ghost texture right using trial and error and having to wait for feedback.
And another super-fast render. This time of a midge, I previously gave up tweaking the textures on this one as it took several minutes to see the effect of any changes. Not now :)
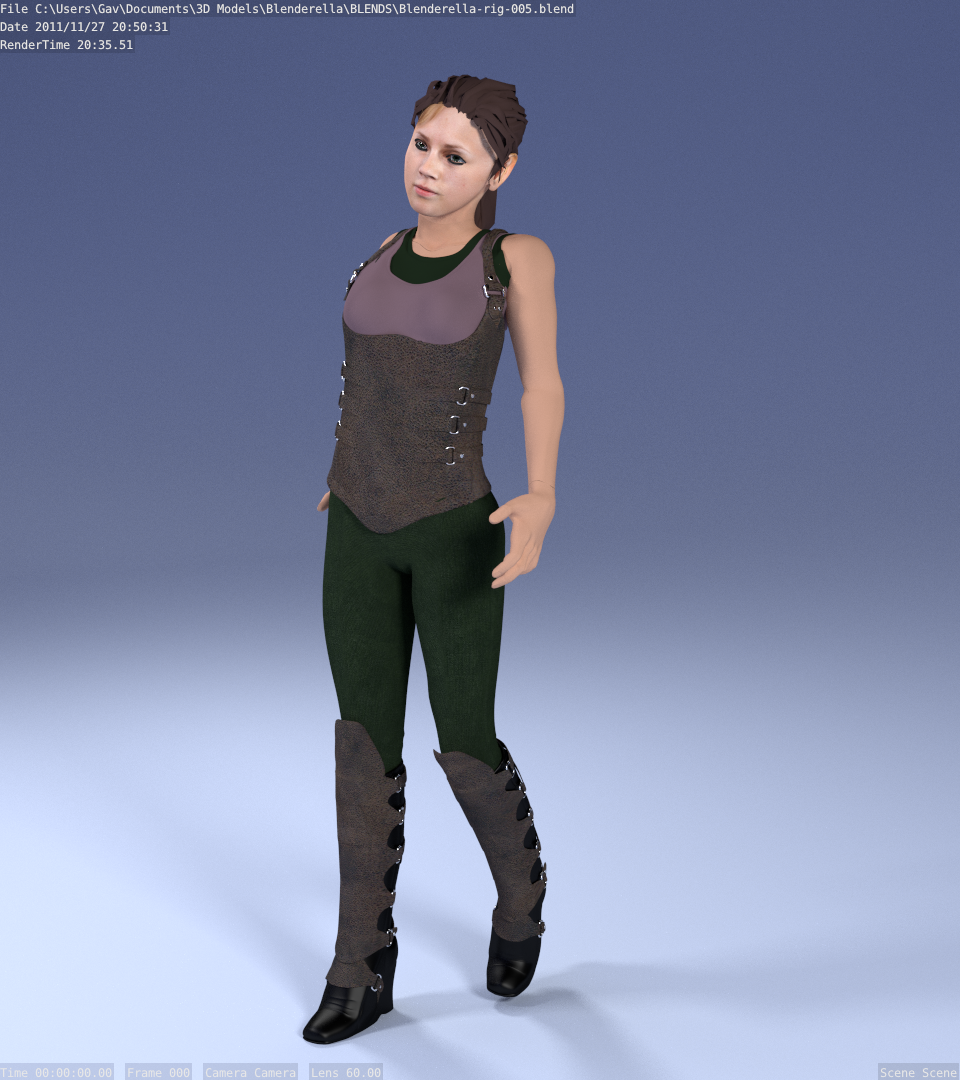
An update on my Blenderella model. As previously posted, I followed the excellent Blenderella follow-along DVD from Angela Guenette. I am happy with the model but have had some abortive attempts at rigging her for animation.
Using the rigify script. I finally completed the rigging. I am now tweaking the weight painting at different poses. The body is fully rigged but I now need to find a good face rig also.
I also made a start on UV Unwrapping and texturing, and converting my placeholder textures to Cycles.
The great thing about using an open source application for creating 3d content is that updates get released frequently, and I get to play with them even before fully released. But also the worst thing is that updates get released frequently, and I need to learn how to use them all over again!
There has just been some major updates to Blender, available from GraphicAll.org, materials work in a completely different way, the render engine has been revolutionised, camera tracking and dynamic paint plus other goodies from the summer coding efforts.
This is my first serious attempt to re-learn how materials work.
Scottish Politics is an interesting place these days with an ongoing battle for the minds of the population between the mainstream media and bloggers. The phrase CyberNats (Cyber Nationalists) was coined to refer to online bloggers who challenge the storyline being pumped through the established news channels.
Without going too political on here, I liked the imagery of a CyberNat, here is my interpretation based on the dreaded highland midge.