The
Nature Academy is re-running and I have been keeping an eye out for the additional tutorials available in this second course. This one is a real test of my hardware spec. It involved running a fluid simulation over the model of a stream-bed and some rocks.
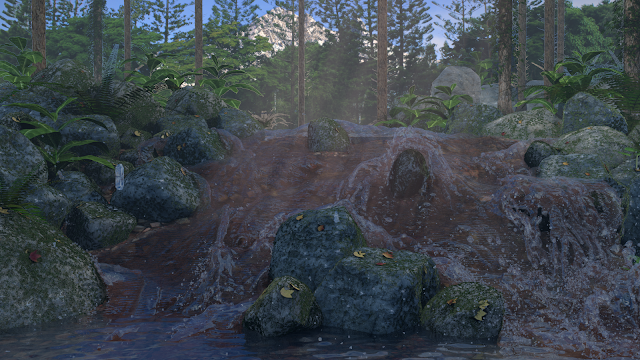 |
| Final Version |
Fluid simulations, it turns out, are very memory intensive, although I have a quad-core system and plenty of compute power, I
only have 8Gb RAM. That is the max my motherboard can take (ASUS Rampage Formula) so a memory upgrade is not an option without some serious cash outlay on a new system or at least a new motherboard.
Having set up the model of the stream-bed, the max resolution I could run the fluid simulation at was 400 (that is 400 on the x, y and z axis of the fluid domain). To get anything like acceptable results, I needed to get this above 600.
My scene was pretty heavy, as well as the fluid simulation, the scene had around 7.4 million vertices and 14 million faces. The moss on the rocks are particle systems modelling each moss strand.
Initial attempt on my home PC:
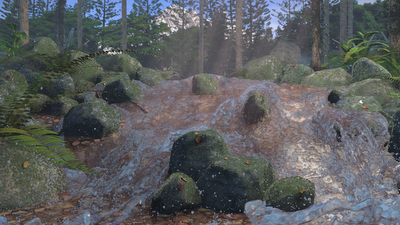 |
| Best I could achieve on my home PC |
Not too bad but took > 24 hours to run the fluid sim (at a low 400 resolution) and render. With those sort of cycle times, making adjustments and re-rendering to confirm the result is just not workable. There is a really ugly splash right in-front of where I want the camera to be in this scene, I could try to sculpt that out in edit mode, but my PC is really struggling and keeps crashing.
Time to dial-up some on-demand cloud computing power
I use Amazon Web Services (AWS) for extra compute power on-demand at work, so I set about figuring out how best to use compute power from the cloud to solve my problem.
It turned out to be pretty easy.
If you have not done this before, you first need to set up an AWS account (aws.amazon.com). They have a sign-up process you will need to go through that involves providing your credit card and validating your account. AWS has a lot of options and can look intimidating at first glance, The service you need to run a server is
EC2 (Elastic Cloud Computing). There are
getting started guides that I would recommend you look through.
There are a few things you need to set-up.
- An AWS account
- A key pair used to identify you and allow you to securely log into the cloud servers you create.
- A security group (if you are using a Windows machine, your security group needs to allow port 3389 to connect using RDP).
I will concentrate on Windows. If you plan to use Blender on a Linux machine, you probably don't need my help working through the options for AWS and there is a lot of searchable help on the internet if you get stuck. Linux is cheaper on AWS than Windows - so worth some investigation.
Please note: AWS is not free. Starting services on AWS will result in charges being made to your account. Some charges, like storage costs, will keep on coming even after you stop or terminate the server. The charges are pretty low but it is always worth keeping an eye on you account summary during and after using the service to avoid any nasty surprises when the monthly bill comes in. I have posted my costs below to give you an idea what to expect. I have also included price information in this post, AWS pricing changes often (usually coming down) although the proces I mention are accurate when posted, if reading this in the future, go check the AWS site yourself for up-dates.
On-demand prices for running AWS servers are available >>
here<<
Once you get to a point where you can start your own server and log onto it, you can use it for some additional compute power when needed.
Installing Blender on a Windows server is done exactly the same way you would install it on your own PC. Log onto your server, open Explorer and go to
blender.org or
graphical.org for the latest build. Once I got a set-up I was happy with, you can convert your server to a Private AMI (Amazon Machine Image) from the AWS Console. A Private AMI can be used in future to very quickly launch a new Blender server. The image file for the Private AMI will cost you a few cents per month in storage costs - but the cost is negligable.
A very nice feature of the Private AMI is you can use it to launch any size of server from the micro ($0.035 per hour) to the high-memory extra large ($0.570 per hour), to the extra large memory plus quad core CPU ($0.920 per hour) depending on what you are doing. For initial set-up and messing around, you could use the mico size, but you will need something bigger for doing actual work on.
Don't bother with additional items like an elastic IP address. It costs, and unless you are launching a public facing web-server, you don't need it.
You also need somewhere to store your blender files and for working space for cache files and output. A Windows server will come with 30Gb of EBS (Elastic Block Storage) mounted as C:\ when it starts. Beware though, the EBS volume that comes with a server will delete if you terminate the server.
I recommend keeping your data seperate from the Windows operating system and avoiding putting any blender files or data into C:\ . A better solution is to create your own EBS Volume of say 80Gb that you can mount to a server whenever you need it. Note: this will cost and you pay for the size of disk you create, not how much you fill it - but again, not very much. ($0.11 per Gb per month or $8.80 per month for 80Gb)
If the EBS volume does not appear as a drive letter after attaching it from the AWS Console, you may need to run "diskmgmt.msc" from the server to online and format the disk. The steps involved are laid out pretty clearly >>
here<<
If you are still with me, so far you have a Private AMI that you can use to launch any number of servers from and a space to store your .blend files. The next problem is how to get your .blend file loaded onto your Amazon server to get some work done.
This is most easily achevied using the Remote Desktop Connection client from a Windows PC, from the client, Local Resouces tab, More button, you can choose local drives that will appear as connected drives on your server when logged in. Simply copy the .blend file you are working on over to your attached EBS volume.
Oh, and I guess it is obvious, but only the .blend file and the output images need be copied back down when the job is complete. The 40Gb + of simulation data is throw-away.
A thought for the future:
It would be straight forward to use the steps here to create multiple network render instances of Blender to handle animations. One server would be configured as the master with however many servers you want configured as slaves. Each machine would need to be capable of rendering a scene, so likely looking at large Windows instances (with 7.5Gb RAM) for both Master and Slaves at around $0.460 per hour each.
Back to Blender
So, now I have a high-memory extra large server running on Amazon with the latest build of Blender running, back to my initial problem, I was able to re-run the fluid simulation at a resolution of 600 which took about 18 hours on Amazon. Anything over a resolution of 400 crashed my machine previously.
Next problem, getting the right settings on the water material for my stream. Here are some interim results.
1st attempt:
Using raytrace for the water material. 2 samples for transparency not enough resulting in black areas over water surface. Render-time approx 4 hours using 12Gb Ram (out of max 14Gb).
2nd attempt:
Raytrace on the water material, using 4 samples for transparency. Render-time approx 12 hours, 12Gb RAM. Some sort of water monster rising from the deep in the centre. This is getting silly again - switching to zbuffer transparency to try a different approach.
3rd attempt:
Water surface is too indistinct, but the droplets are better. Render time 2 hours: 22 minutes, 12Gb RAM.
And the wallet damage:
Anybody want to buy a print?


